
In the last part, I explained that I want to make a larger battlewagon than my normal variants. First of all this means widening the basic battlewagon design. I’m going to talk you through how I widened the cab of the plastic GW battlewagon but not the rear portion of it, however the same techniques can very easily be applied to the rest of the battlewagon.

The first thing I did was to cut the top panel and front panels of the cab in half. The top panel was cut along an existing panel line.
I used a fresh, sharp heavy duty stanley knife, a metal ruler to keep the cut as clean as possible and then a file to make sure that the cuts were completely straight.
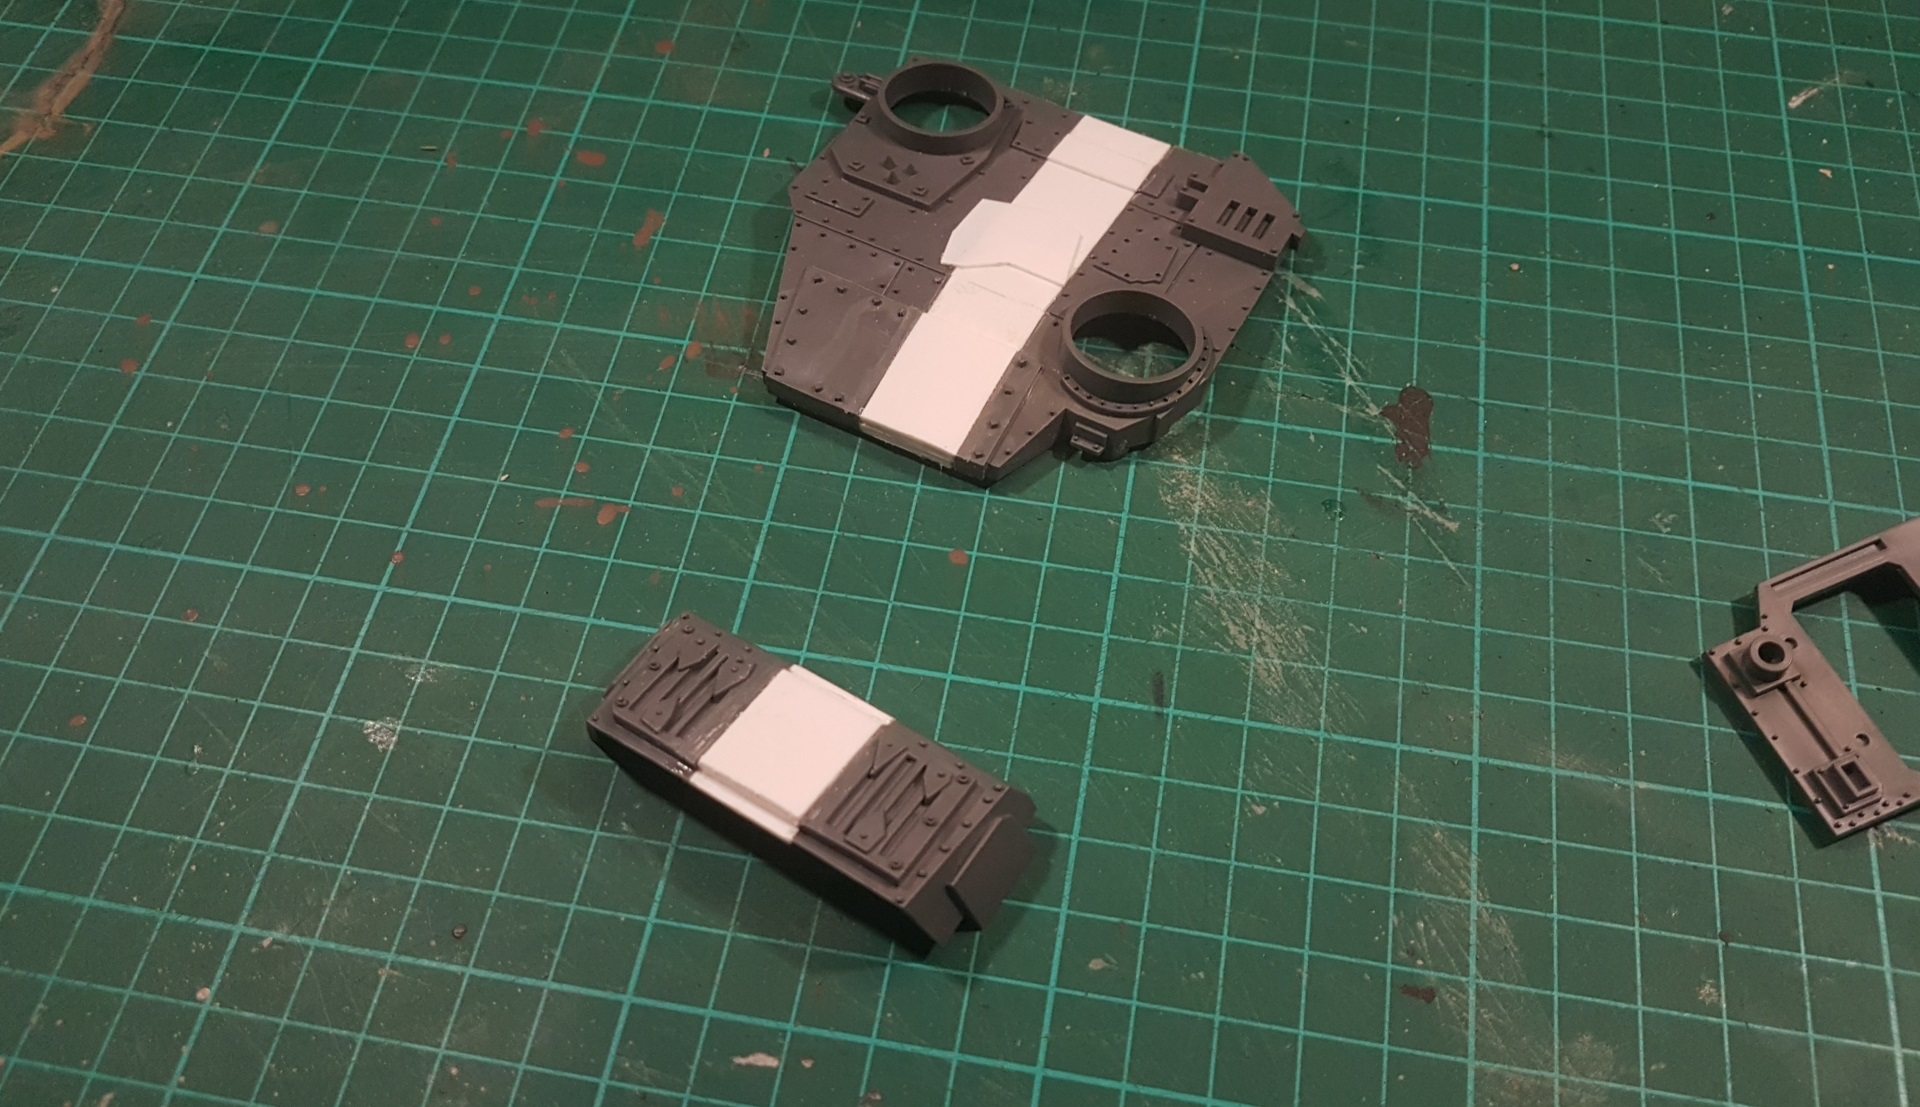
Next, I cut out a 15mm wide strip of 1.5mm plasticard. This strip was then cut to the right length to go in between the two halves of each piece. I had to use multiple shortened strips to match the various angles in the existing panels. I lay some offcut strips at a perpendicular angle on the inside of the two pieces to give the connection extra strength. Just gluing the 1.5mm flat side to the two halves would not have been a strong connection!
I also cut out additional plates from 0.5mm plasticard to cover up some of the joins between the original battlewagon pieces and my plasticard pieces. These aren’t very visible in the photos above due to the white plasticard but they are more visible in the photo below.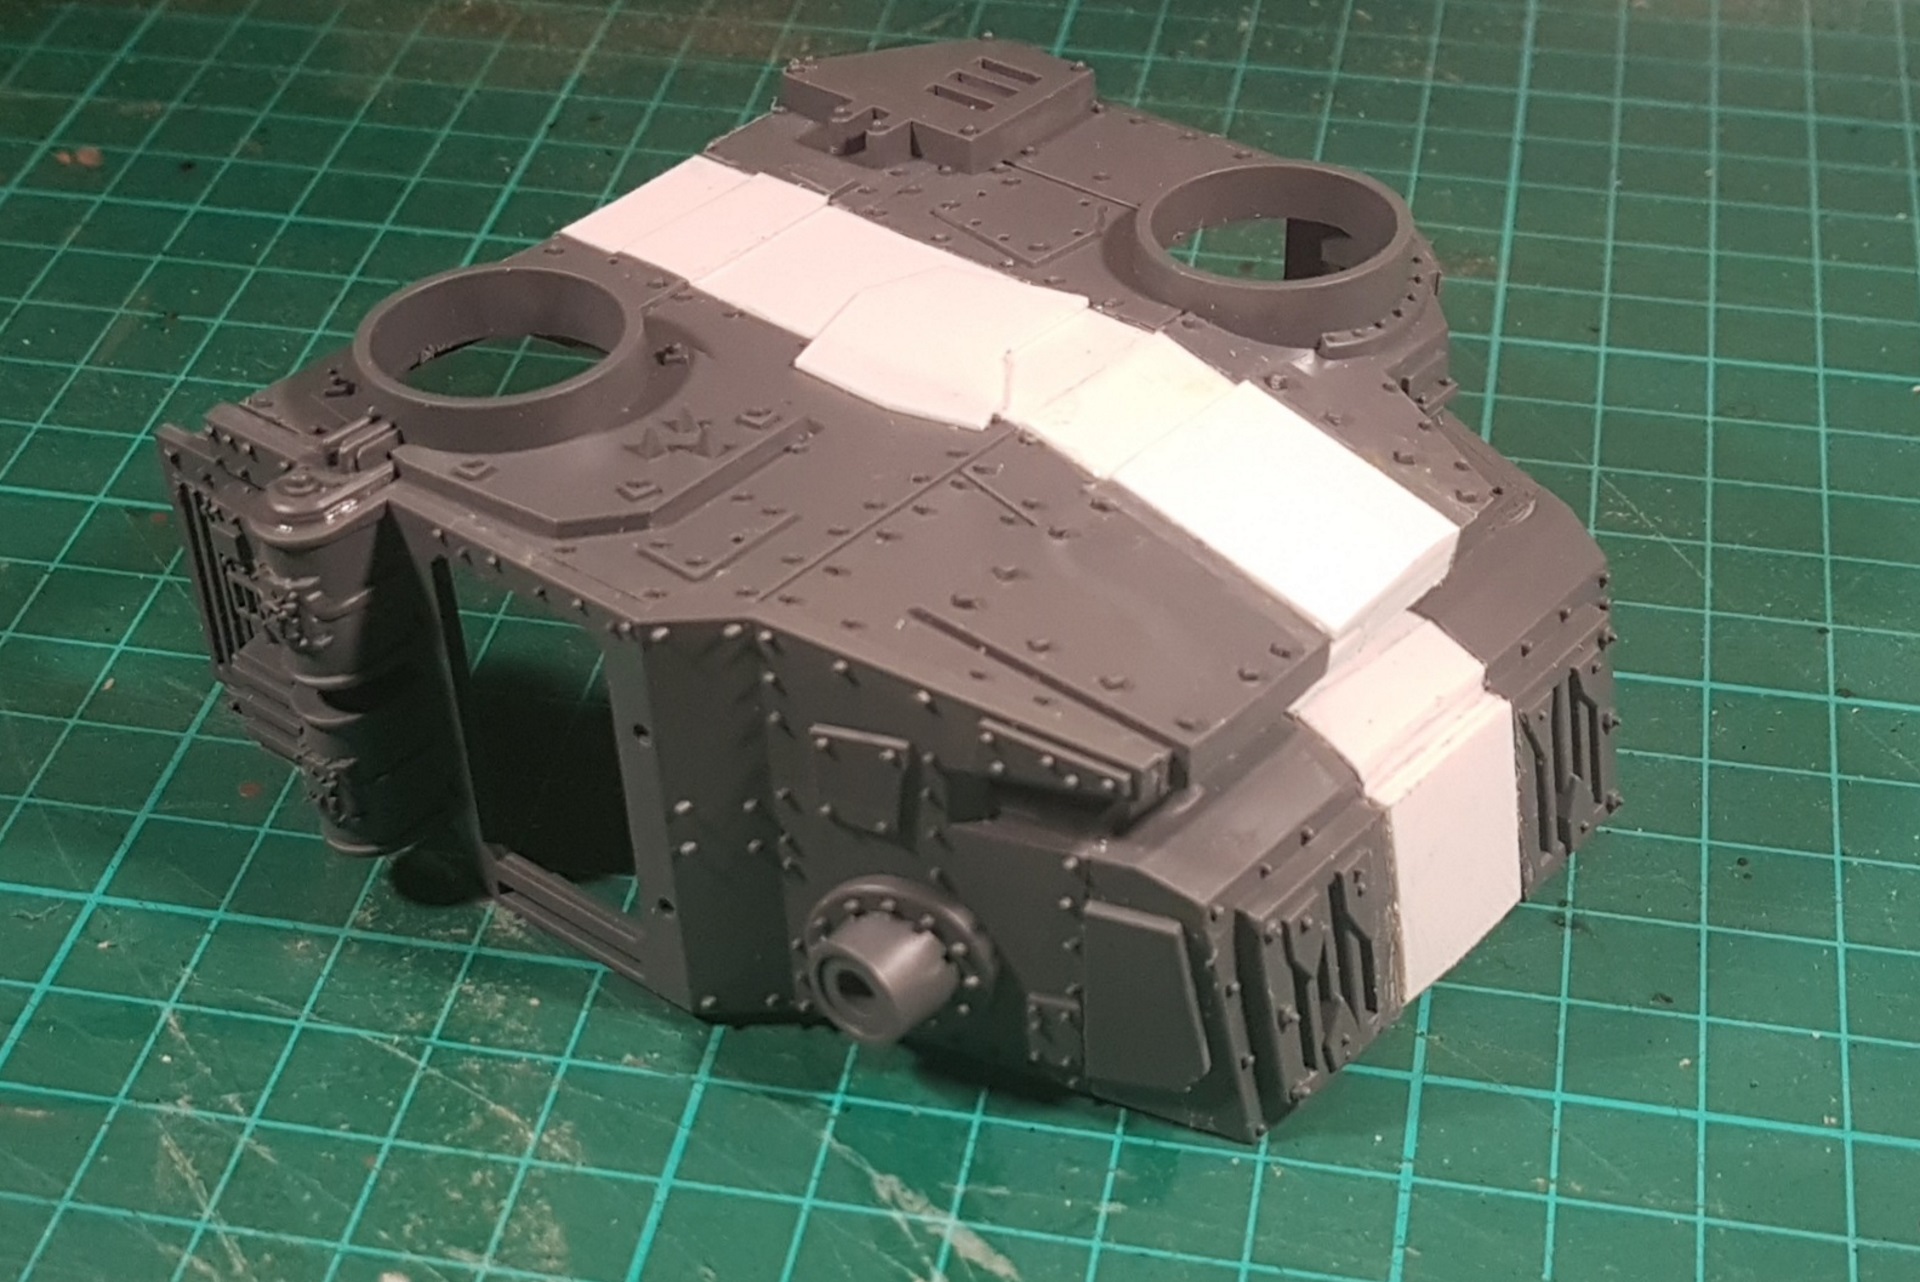

Next I assembled the cab as normal, except for the bottom piece.

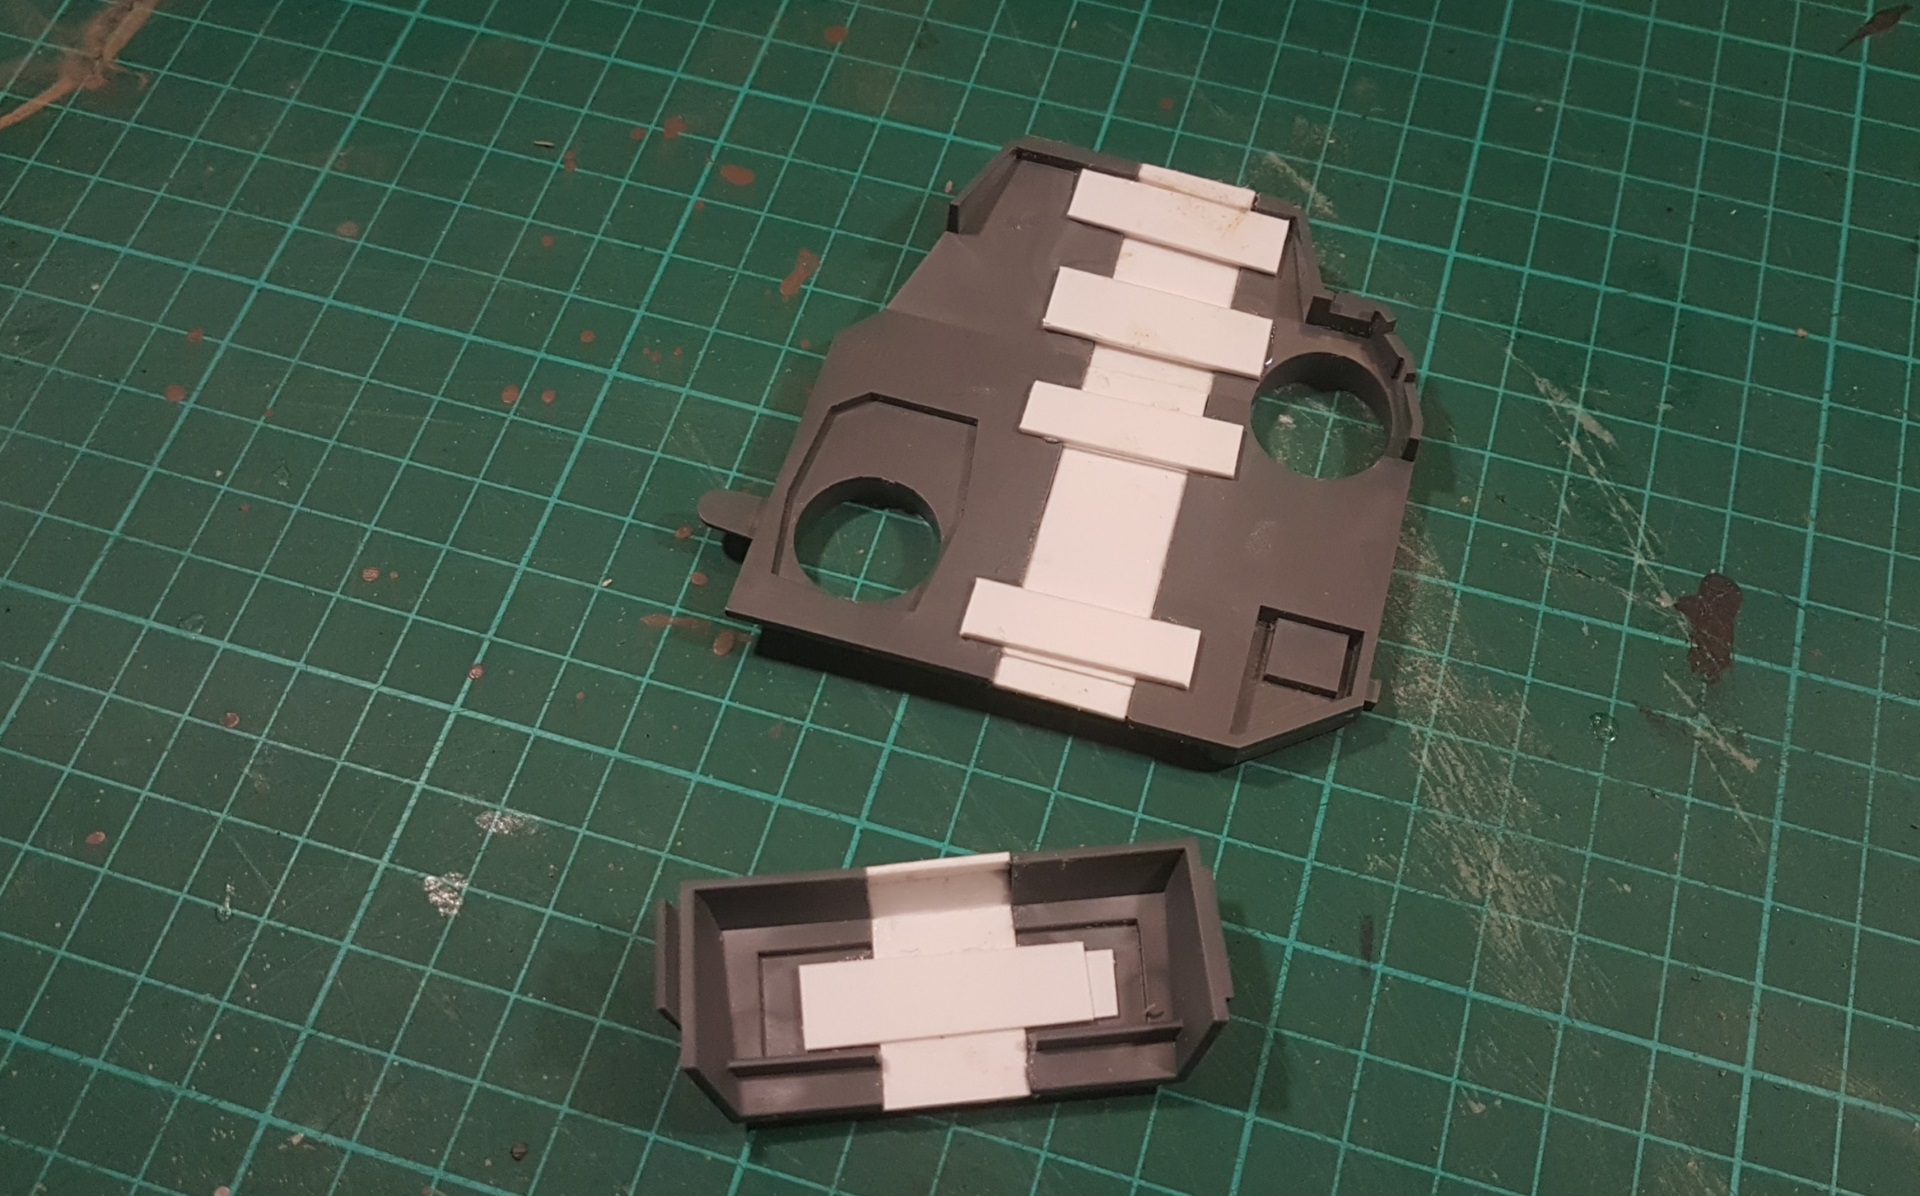
Finally for the bottom piece. Now the proper bottom piece, shown on the left above, goes all the way along the full length of the official battlewagon build. It also contains a lot of useful textures that would make for interesting scrap. Since I’m not going to be building the rest of the battlewagon to spec, I decided to cut my own new piece entirely from Plasticard rather than waste the textures on parts that will be entirely hidden in my build. I did this by tracing around the relevant part onto plasticard, then extended it in one direction by 15mm before cutting out.
All in all, I end up with a widened Battlewagon cab. The techniques that I’ve used can be used for the entire GW battlewagon if you so wished – if you wanted to convert the GW battlewagon to be wider. For my build though, I just needed the cab.
