
I really like display boards.
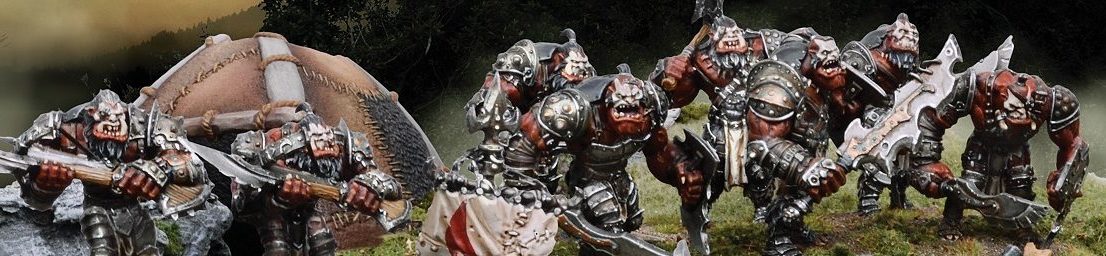
I really enjoy making terrain in general and display boards are a great excuse to crank out a massive piece of detailed terrain, thematic for your army. My Brotherhood army was always intended to be a display army where I would go all-out on the painting and conversion, so I wanted to go over the top with a display board (though in the UK it seems that simply having a display board at all is going over the top…).
There was an Australian army posted in Fanatics a while back whose display board was on a giant turtle’s back (not on the back of four elephants stood on a turtle, sadly). I loved the idea of a non-square edged display board and one that was modelled as *something* rather than a flat piece of terrain.
Islands floating in the sky are a popular fantasy trope, one that I’ve always liked and this seemed like a perfect opportunity!
I wish I could say there was a large amount of planning involved… but honestly there wasn’t. I largely had a vague idea in my head and just started building. I’ve a lot of experience with building terrain so I didn’t need to research techniques or materials, just do what I’ve done before but bigger!
Materials
A not-complete-but-certainly-most-of-it list of materials:
- A LOT of Styrofoam (mostly offcuts and leftover sheets from previous projects, but I ended up having to buy a new sheet halfway through)
- 3mm MDF
- Wooden baton
- 3D printed slots for the baton
- Expanding foam
- Sculptamold
- Clear plasticard
- Vallejo still water
- Vallejo Water Effects
- Basic grit and flocks
“Sketching” the board
You could spend hours meticulously planning a display board on paper. Planning the measurements down perfectly. Looking at how much material you’ll use and ensuring you have it on hand. Perhaps make a mockup at a smaller scale. This applies for terrain projects in general.
I prefer to have the basic idea in my head and then jump immediately to “sketching” at full scale. This means cutting out rough shapes and blocks, measuring as I go. You end up with a lot of off-cuts and the finished product can organically end up looking quite different from what you initially had in your head, but I much prefer building this way – perhaps it’s the Ork Mek in me!
The board started out as a single piece of 50mm blue Styrofoam, left over from a previous project. I was originally going to order a larger piece but after placing my planned units out on the board, it did look like they would fit (spoiler: they didn’t).
I sketched out the rough positions of the units and drew the landscape on with a large black marker. I then used some 25mm foam to build some contours.
For me, one of the things that makes a display board work great is if you have different steps for different units to fit on, so they don’t all sit on the same level and block sight to each other. Having a stepped display board means that people can see all the units from the front, rather than only the front row of units. One of the tricky things is working in a natural reason for the steps. In this case I knew I wanted a ruined, overgrown temple on the board so that was a perfect reason.


The base
I’d originally wanted the board to spin.
Yes. Spin.
I even bought the rotating display board to do that. However, I had concerns about the stablility of balancing such a large board on such a relatively small base, and that only increased as I wanted to make the base quite lop-sided with a large temple on one side. The extra weight would unbalance the display board, so it would be at a strong risk of tipping over.
In the end I figured that the risk wasn’t worth it and settled on having a static base for the island.
I figured that making the base detatchable would help with transport. To connect the two pieces, I used a wooden baton, left over from a board build ages ago, and 3D printed two slots for it to go in. These would be secured to the base and the underside of the main island.
I then stuck down two “legs” made from the rest of the baton to the MDF base. All of these pieces were secured first with hot glue, then with No More Nails.

Padding out the underside and base
Next, I worked on padding out the underside of the main island the rock formations on the base.
The underside was done by creating layers and layers of Styrofoam offcuts. I didn’t have complete sheets, just smaller pieces that have been left over from previous projects. These were roughly trimmed to shape and then stuck in place with hot glue.
I used expanding foam to fill in the larger gaps. Once cured, I trimmed it down and covered the entire surface with Sculptamold. I used to use Polyfilla for this sort of thing, but Sculptmold is my favourite material now – it fills gaps much better than Polyfilla, sets much quicker and can be smoothed by rubbing it about 20 minutes after it’s been applied.
For the base, I used Styrofoam blocks carved into rough rock shapes. These were glued into position with a glue gun, then gaps were filled with Sculptamold.


Detailing
Once the underside was completed, I could work on the topside.
I continued to refine the shapes that I’d “sketched” out, trimming pieces down and then once happy sticking them down with hot glue. While hot glue isn’t the strongest glue you can use, I find that it’s more than sufficient and the near instant curing time really helps with building terrain fast.
I wanted the temple to be removable, partly for ease of transport but also so that I could use it as actual terrain in my games. I cut out two identical MDF bases, stuck one to the display board and kept one for building the temple on top of. Styrofoam is plenty strong enough for building landscapes out of and ideal for terrain building, but it will take chips and dings as it gets moved around. Sticking a duplicate of the base to the display board means that the part where the template sits will remain the same shape.
The temple itself was built out of Styrofoam (do you see a pattern here?) blocks. I sketched it out again and then carved the stones into the foam with a knife and a pen. I used a metal ruler to push random blocks into the foam, making them look untidy and worn.
The floor of the temple (and bridge) was a piece of textured wallpaper trimmed to size.
All the rocks around the top of the display board were carved out of Styrofoam and I used Sculptamold to blend everything together.
For the separate islands, I used some 3D printed supports and slots that were buried in the foam and sealed in with hot glue and sculptamold.


Texturing
For texturing the rocks and cliff faces, I used a textured stone spray paint by Rustoleum. This gives a slightly rougher texture than bare Styrofoam and looks great when painted over (don’t just use it unpainted…). Most spray paints dissolve Styrofoam but not the stone textured sprays.
All the rock areas got two coats of stone texture.
Once the spray was dry, I used a variety of sand and grit to texture all of the dirt areas. This was stuck down and then sealed with Mod Podge. I avoided getting large grit on areas where I wanted models to stand, since this would make them uneven. Instead I just used fine sand for those areas.
To seal this all in, I first spray terrain pieces with wet water (water with just a drop of dish soap mixed in) until they’re almost dripping wet. Then I spray them again with heavily watered down mod podge. The first spray of water helps break surface tension and allow the mod podge to spread everywhere. After this has all dried, that grit aint going anywhere.


Painting
The piece was basecoated with emulsion paints. Emulsion paints are great for basecoating terrain, but pretty bad for all other wargaming uses.
Dirt dark brown, rock dark grey. I’d rather I had the grey a touch darker, but I didn’t have time to start redoing sections.
The dirt was drybrushed with a variety of intermediate colours. One of the big mistakes I see when it comes to painting terrain is people drybrushing from the shade colour straight to the highlight. At best they’ll do one in-between colour. This looks flat and boring.
Instead, I paint my terrain, particularly dirt, with a variety of colours and shades. When it came to the dirt, I used various browns and even some red-browns. Once the final highlight is on, the colour variation that you get makes the piece look much richer and more vibrant than if you do a simple basecoat-midtone-highlight drybrush.
Additionally, I drybrush in circles. If you drybrush in straight lines then you end up with streaks on the terrain piece. Instead drybrushing in circles eliminates those streaks and also helps you vary the tone and shade of the terrain, enhancing that richness that using a variety of paints gives you.


Flocking
Flocking was fairly standard for me – use a large variety of flocks! I mixed up a variety of static grass shades to resemble the tufts that I’d been using on my army bases. I dabbled mod podge around the piece and then scattered the grass mix on that.
I added a few pinches of coarse flock around the piece for additional texture.
This was all secured in place with mod podge, by first spraying with wet water and then with watered down mod podge as before.
Now it’s on to the rest of the foliage.
I wish there was some big secret that I could share. Some mind blowing “omg that technique is amazing” to get really high quality bushes and foliage. Well, here it is:
Buy a bunch of bushes from http://polakscenics.uk.
They make a whole bunch of incredibly realistic bushes and foliage in general. It is all very expensive, but I feel that the quality is well worth it if you’re wanting to take your bases and displayboard to the next level.
I bought a variety of scenic items from that website and affixed them with a drop of mod podge or superglue.


Water Effects
I do not recommend this method.
It was done for sake of time and my lack of experience with resin, but the effect can be vastly improved by using two part resin.
However, to make the river I first created a dam along the edges with Vallejo Water Effects (NOT still water). This stuff is a gel, rather than a liquid (I’m sure chemists will be on my case over that, but you know what I mean) and retains most of its shape as it cures. Water or resin flows everywhere and fills its container.
Once this was cured, I began pouring layers of Vallejo Still Water, and later Woodland Scenics Realistic Water when I ran out. These layers would be thin, only a mm or so thick and I would wait for each layer to cure before pouring the next. This process took several days to complete.
Unfortunately, the material is not suited for deep pours. Even though this wasn’t the deepest river ever, I still had problems. The deeper layers cracked and went cloudy. I suspect that this is because the bottom layers were not fully cured when I poured additional layers and as they shrunk in the curing process, this caused them to crack and come unstuck, leading to the cloudiness.
Luckily these issues were largely in areas where I would be placing my water elementals, so would be covered up on that day.
To achieve the rippled effect on the water, I stippled Vallejo Water Effects on top of the smooth river.


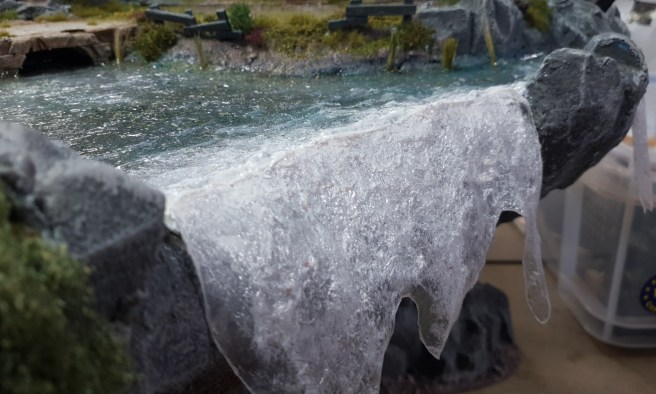
Waterfalls
A lot of scenic diorama creators will create waterfalls by simply building up several layers of Water Effects, gradually mixing in white, on top of sheet plastic. The dried water effects won’t stick to the plastic; they can be peeled off and stuck in place on the diorama.
Unfortunately this has two issues – firstly the peeled water effects is not very tough and won’t stand up to being moved about, and secondly the cured water effects still sticks to itself. Both of these issues would be unsuitable for my application. The display board does need to be fairly hard wearing, and those waterfalls would soon get accidentally ripped off or damage, and with them sticking to themselves, they would soon end up as scrunched up glueballs.
What I did instead was apply a few layers of stippled water effects on top of clear plasticard, and then cut the shapes out. To keep the water effects stuck, I also coated the back and sides with even more water effects, sandwiching the clear plastic sheet in between for rigidity.
The waterfalls had to contour to the terrain, and while the plastic sheeting was slightly flexible, it wasn’t *quite* flexible enough. I tried heating the sheeting with a hair dryer to soften it a bit but it still wasn’t quite malleable enough to get into position and hold its shape.
So, I turned my oven on. It was set fairly low (I’d be guessing if I gave you a number) and I put one sheet in the oven at a time. I found out very quickly that the gap between “too rigid to work with” and “curls up into a ball” is very, very short. I had to redo one of them after it curled up completely beyond any use. However, after leaving the sheeting in the oven for 30 seconds or so, it became soft and malleable (and hot). I was able to put one sheet in the oven, wait for it to soften, grab it before it curled up, and then press it into shape on the terrain and hold it in position while it cooled down.
Once all three were pressed into shape, I attached them with superglue. I then used water effects to fill in the gaps (this isn’t perfect and ideally needs more layers). I started mixing in a tiny amount of white paint into the water effects and stippling it over the entire waterfall area. I have to stress that you only need a tiny amount of white paint – I probably only used about 3-4 drops from a Vallejo bottle across all of the waterfalls.
An add-on
At this point, I proudly laid my army out on the display board. I’d measured it out beforehand, placed the empty bases on the board before building it.
That was before I’d added all the decorative elements.
The army no longer fit. Specifically, the knight regiments didn’t fit on where I wanted them to, and there was nowhere else to put them.
Luckily the theme of the board (floating islands) lent itself well to additions, so I set about creating a new island.
I sculpted/modelled a chain in Blender and 3D printed it, along with slots for it to be fixed into, so the island would be removed (as with the others). I cut out a space for the slot in the side of the main island, and sealed it in with hot glue and some Sculptamold.
The rest of the add-on island was built in the same way as the rest of the board – largely Styrofoam with gaps filled in with Sculptamold.
In the end, the add-on island is… alright. It’s not brilliantly supported and is a bit… springy. I’m confident enough to put models on there but I would think twice about putting a unit of metal models on there, and I wouldn’t mess around with that island too much while there are models on it.


The finished product
This was a massive project and I’m extremely happy with it, problems notwithstanding.
I went on to win Best Army at this year’s FFS GT – an award I’m very pleased to get. I really enjoy building scenery so it was great fun to go all out on this board. It feels like it’s been a culmination of a lot of different techniques that I’ve cultivated, along with gradually increasing my confidence over the past few years when it comes to scenery and hobby.
Last year I set myself the aim of improving my hobby skills. This board feels like a “Project Achieved” moment.
A few people have asked how I’m going to top this and… I have no idea. The next couple of display boards will be smaller in scope – partly because they need to fit in a suitcase to go to Adepticon! I think going forward I will be looking at improving my fine detailing. A lot of the work on this display board was grand in scope but could be improved with greater detailing close up.
All in all though, a very satisfying project and build.


This is amazing, loved it when I saw it on FB and it goes to show that effort in + talent = fantastic result out.
Maybe the next project needs to be maglev based with all the models floating above the display board, good one for a flying heavy army 🙂
LikeLike